
The configuration panel opens from the agent’s Channels tab - click the Web widget tile. The panel is titled “Web client configuration”.
Configuring the channel on Console
1
Sign in to the FPT AI Agent Platform
Open Console and sign in with your account.
2
Pick the agent to configure
This is the agent that will answer customers on your website.
3
Open the Channels tab
Channels is on the agent’s navigation bar.
4
Click the Web widget tile
The “Web client configuration” panel opens on the right.
5
Fill in both tabs
The Config tab and the Customize widget tab. Details in the two sections below.
6
Click Save configuration
The channel is created and starts serving straight away. The Web widget tile switches to Configured.
Config and Customize widget share one draft and one save button: a single save overwrites the whole channel configuration. Finish both tabs before you save, rather than saving each one separately.
The Config tab
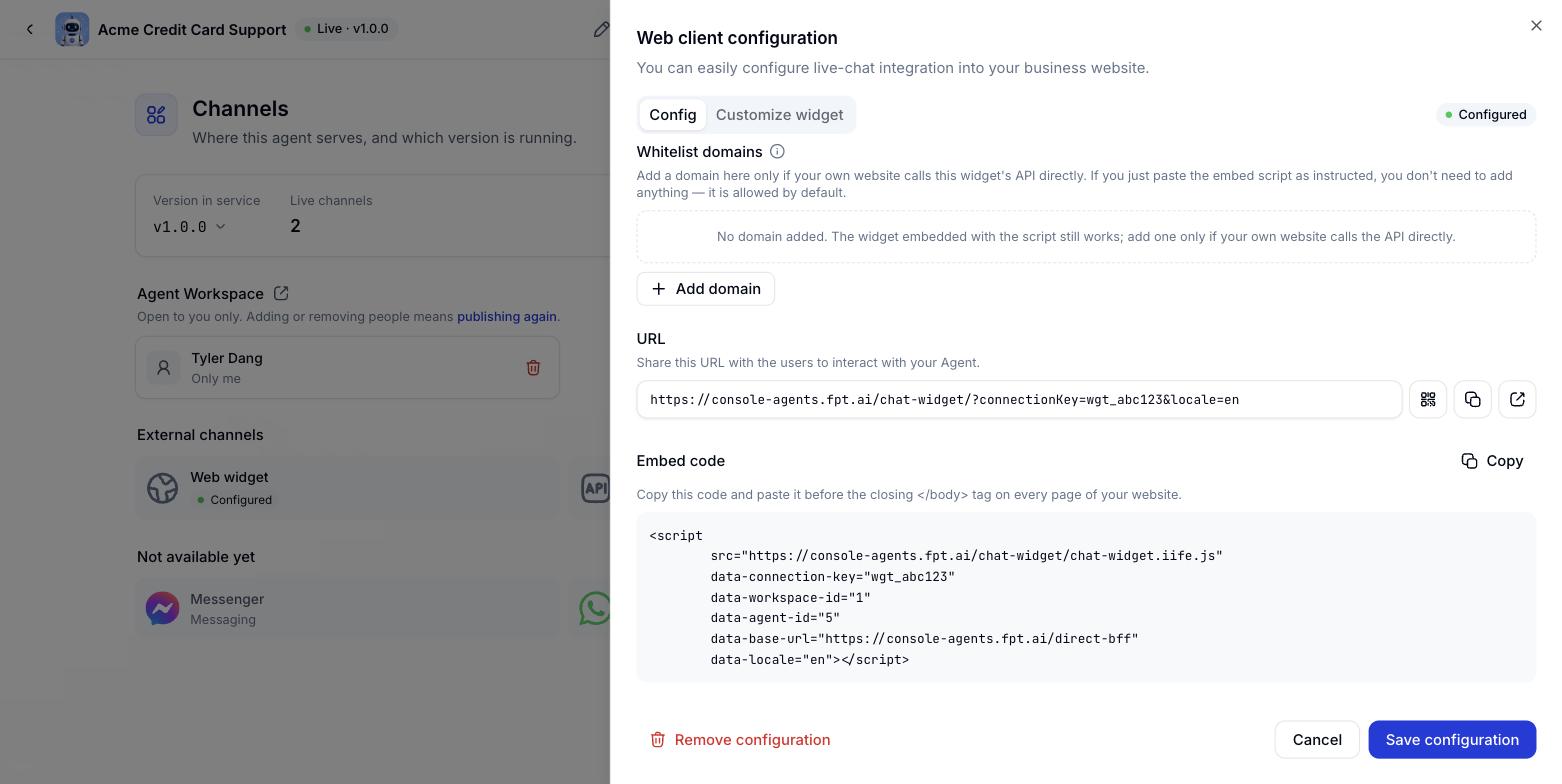
Whitelist domains
The list of website domains allowed to use this channel. Up to 20 entries, each up to 253 characters. Each entry is a single domain such ashttps://shop.example.com, with no path after it. Use * to allow every domain.
Leave this empty if you are just pasting the embed snippet as described below. You only need to list domains when your technical team builds its own chat interface, which is covered on the API integration page.
1
Click + Add domain
A new input row appears in the list.
2
Enter the domain
For example
https://shop.company.com. Do not add a path.3
Click Save configuration
The change takes effect as soon as you save.
Share link, QR code and embed snippet
These three only exist after the first save. Once saved, come back to the Config tab to copy them.Embedding the widget in your website
Copy the snippet from the Config tab and paste it before the closing</body> tag on every page where you want the chat window.
Sharing by link and QR code
When you would rather not embed anything - emailing a link, printing a QR code on a flyer, putting one on a counter - the Config tab gives you a link that opens the chat window full screen:The Customize widget tab
This tab has five sub-tabs and a preview panel on the right with three states: Minimized, Welcome and Chat. Changes appear in the preview immediately, and take effect immediately for snippets already pasted, because the widget re-reads the configuration every time a customer opens the page.Fields you do not change are not written down, so when the platform updates its default palette your channel picks it up.
Theme - colours
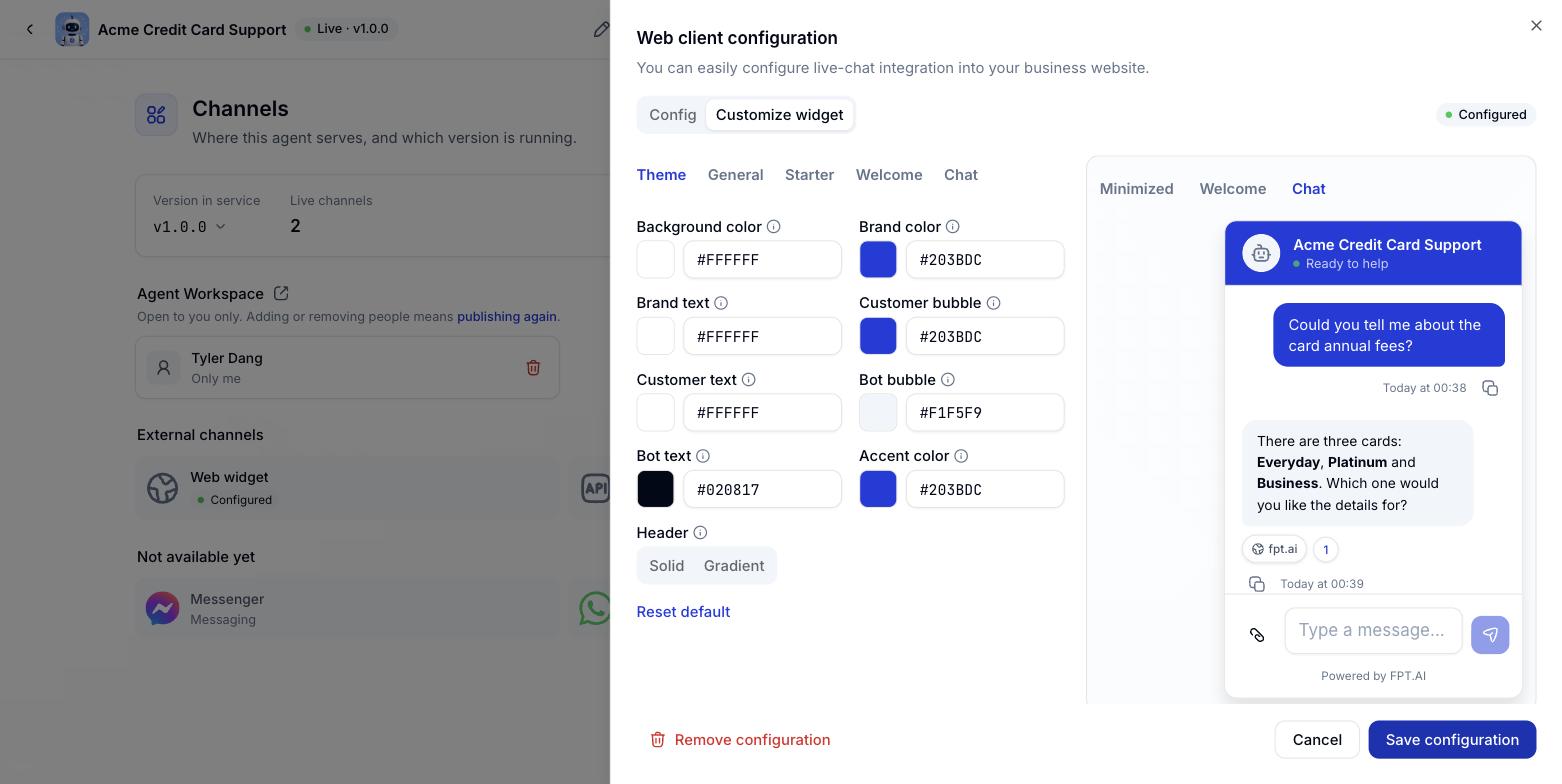
#rrggbb. Badly formatted values are rejected on save.
Click Reset default to put every colour back.
General
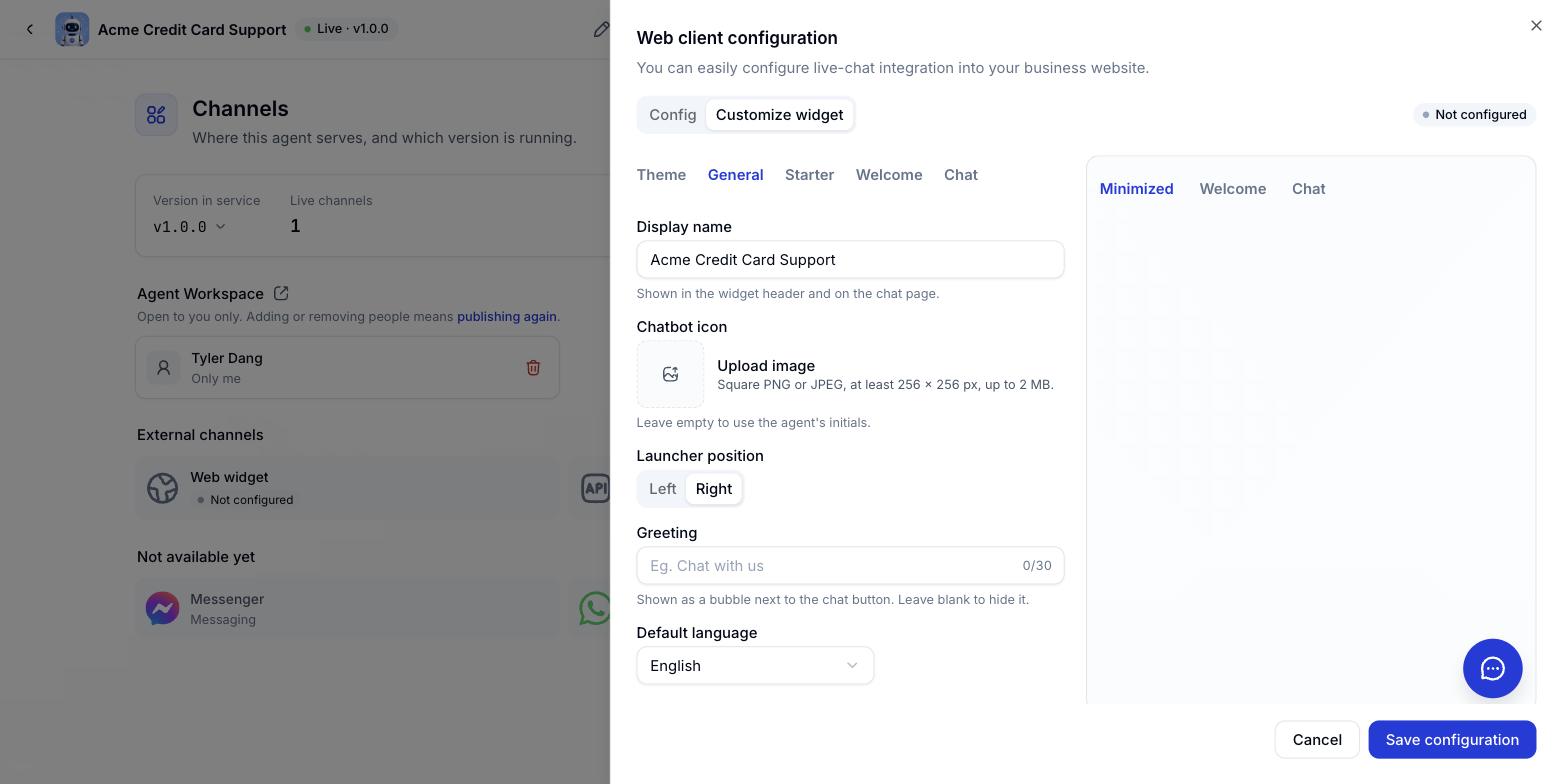
The Website channel no longer has an idle-window option. Conversations on the widget use a fixed 24 hours - go quiet for longer than that and the customer’s next message opens a new conversation. The idle window is still configurable for the API channel, see API integration.
Starter - suggested questions
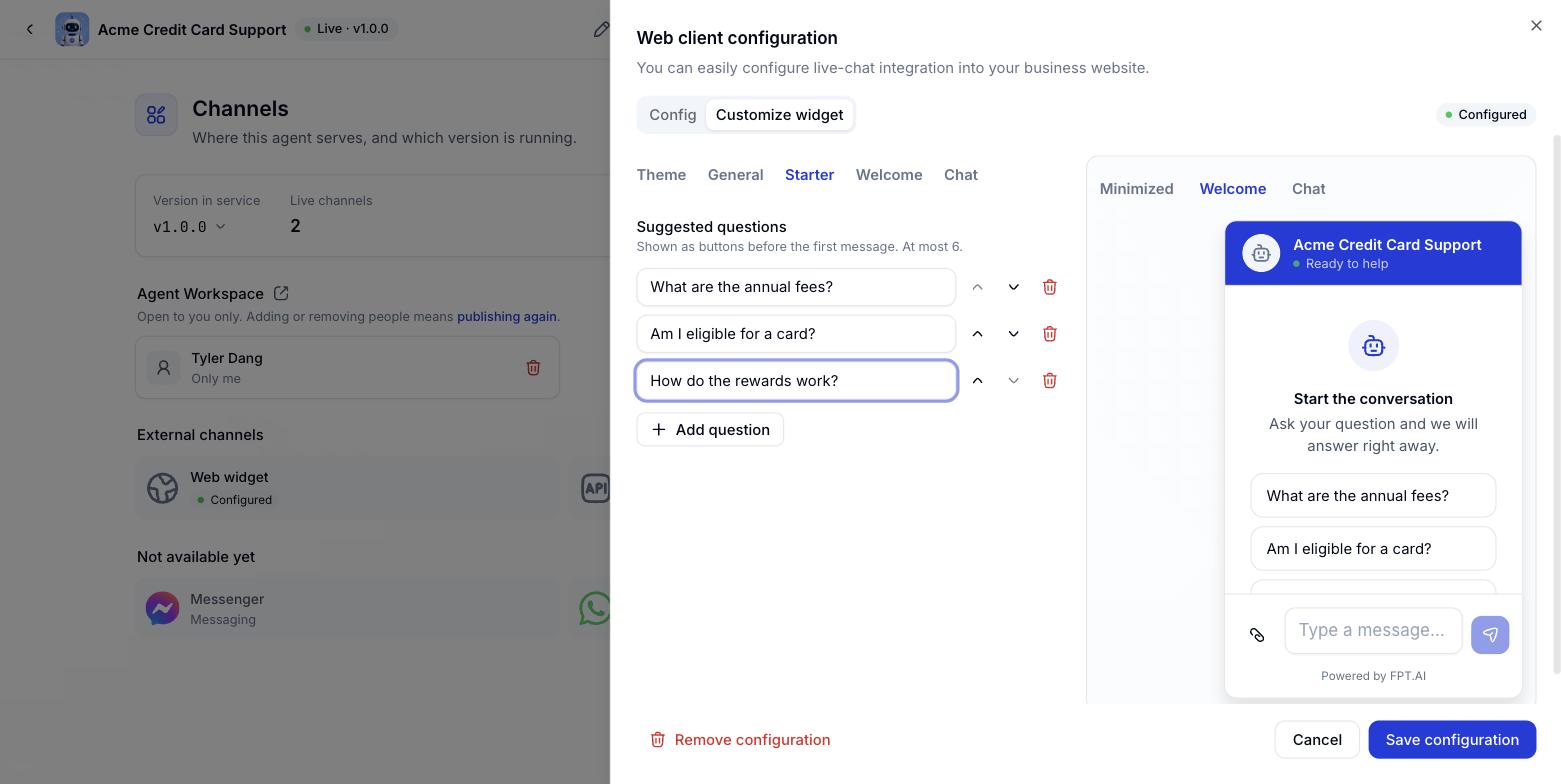
1
Click + Add question
A new input row appears.
2
Type the question
Word it the way customers actually ask, for example “Check my order”.
3
Edit or remove
Click a question to edit it, or the delete icon at the end of the row to remove it.
Welcome screen
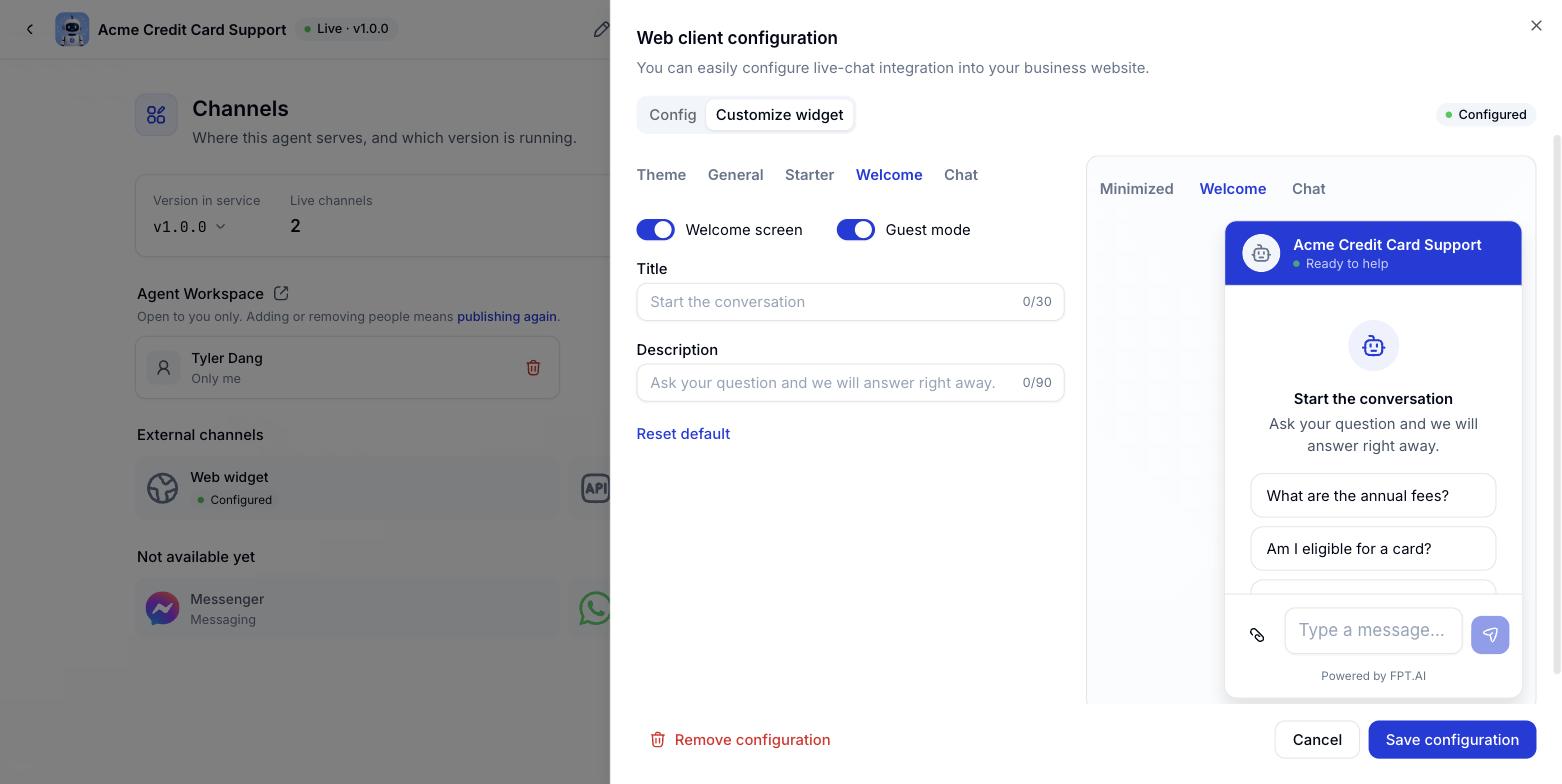
Click Reset default to put the text fields back to their starting copy.
Chat window
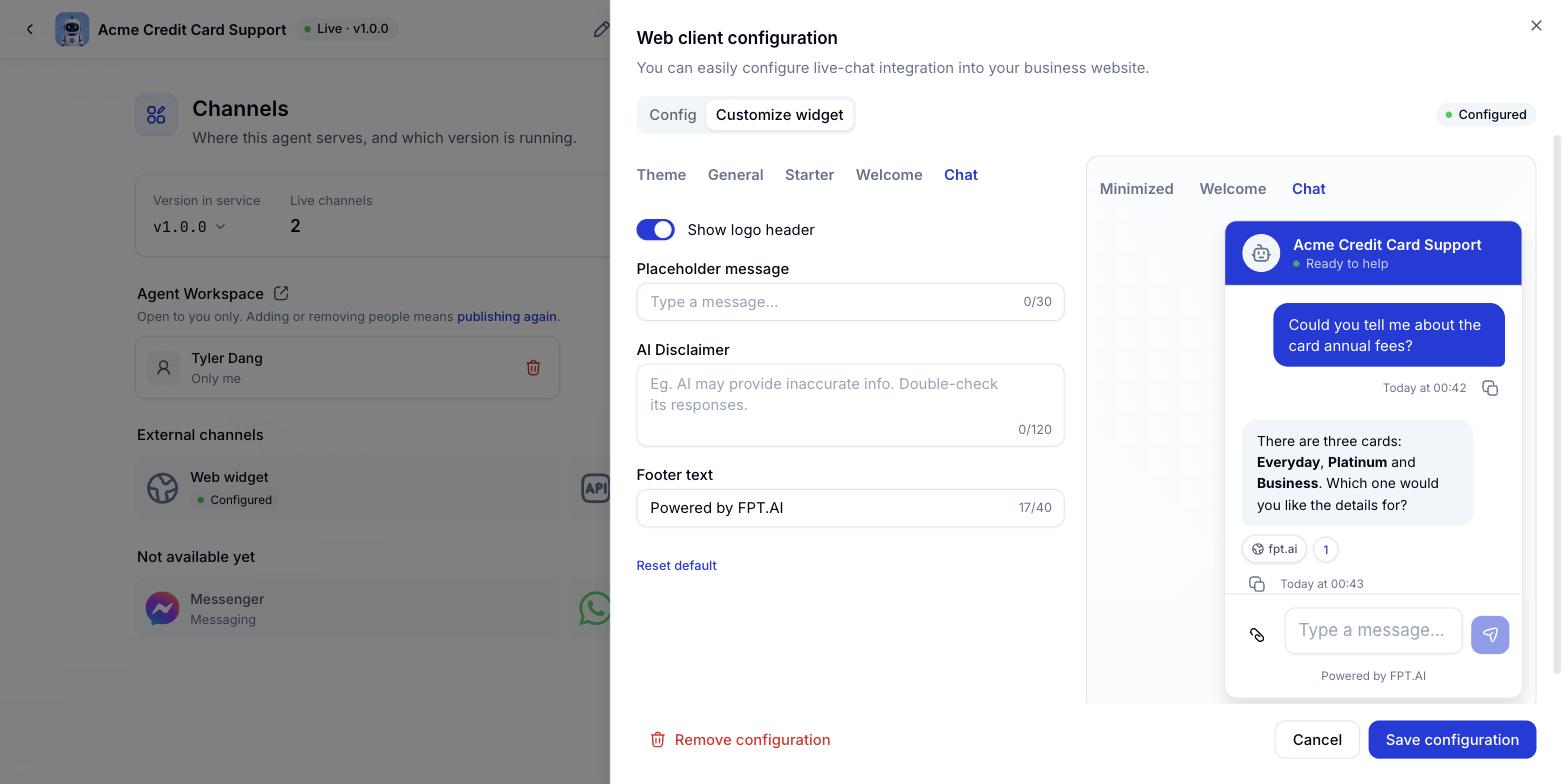
Editing and deleting the configuration
1
Edit the configuration
Reopen the Web widget tile from the Channels tab, change what you need and click Save configuration. Changes take effect immediately everywhere the snippet is embedded - no need to re-embed.
2
Discard changes
Click Cancel to close the panel without saving.
3
Stop serving temporarily
Open the Publish dialog on the Agent builder tab, untick Web widget and publish. The widget configuration is kept.
4
Delete the channel
Deleting the channel configuration removes it from Console and stops it serving immediately.
Next steps
Mobile SDK
Bring this same chat window into your Android and iOS apps.
API integration
For when you already have your own customer-facing chat interface.
Technical appendix
Error codes, system limits and the pre-production checklist.