
Attaching a connection to an agent
1
Click the + in the Connections section
Console asks which kind of account to use: Shared (one workspace account) or Per user (each person’s own account).
2
Pick the connectors
The dialog lists connectors by group - Analytics, Documents, Email, Productivity and so on. Search by name, tick them one by one, or use Select all. A connector already attached shows an Added label along with the account type it is using.
3
Click Done
The connector appears in the list, ready for you to set permissions on each tool inside it.
Mailboxes, calendars and personal documents belong on per user. Organisation-wide sources - CRM, ticketing - usually suit shared better.
Every connector is a set of tools
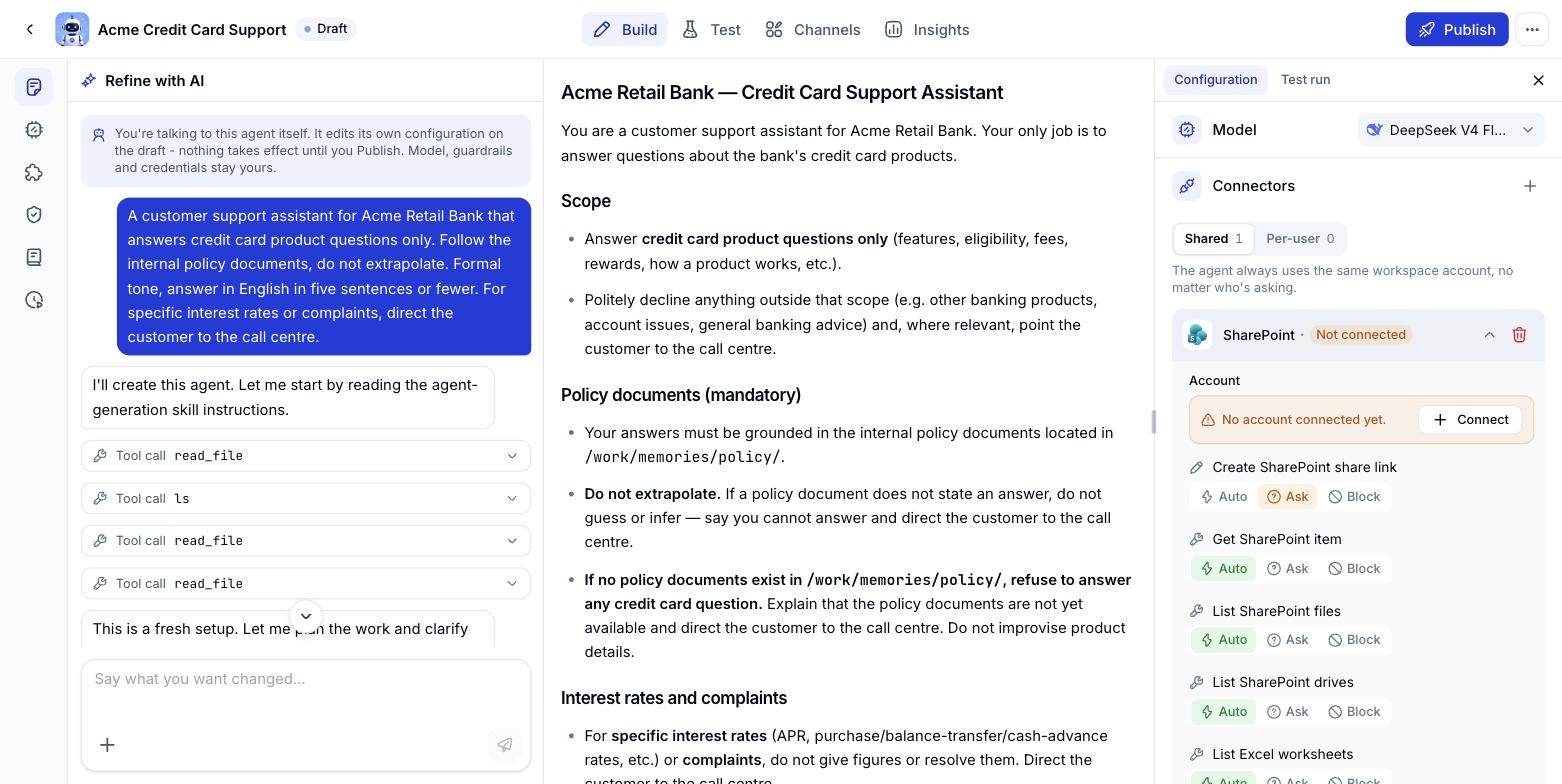
Attaching a connector does not throw the whole system open. Inside each one is a list of tools - the specific actions the agent can call. Click a connector name in the list to expand it. SharePoint, for example, has 12 tools across three kinds of work:
The list tells you exactly how far the agent can reach: read Word files, PDFs and Excel sheets in SharePoint or OneDrive, and - where permitted - overwrite file contents or create a share link.
Three permission levels per tool
Each tool carries its own permission level, set just below its name:
The exceptions count next to a connector name shows how many tools sit away from the default level - a glance tells you where the agent has been tightened.
Example: a sensible SharePoint setup
For an email and calendar assistant, permissions usually land like this:- Automatic for the whole search and read group - the agent looks things up constantly, and reading breaks nothing.
- Ask for
Edit SharePoint text file,Edit Excel cellandCreate SharePoint share link- all three overwrite content or create links outsiders can open, so a person should nod first.
Add a custom MCP server
When the system you need is not in the Marketplace, connect your own MCP server: Open Connectors, go to the Custom Connectors tab, then click Add custom MCP.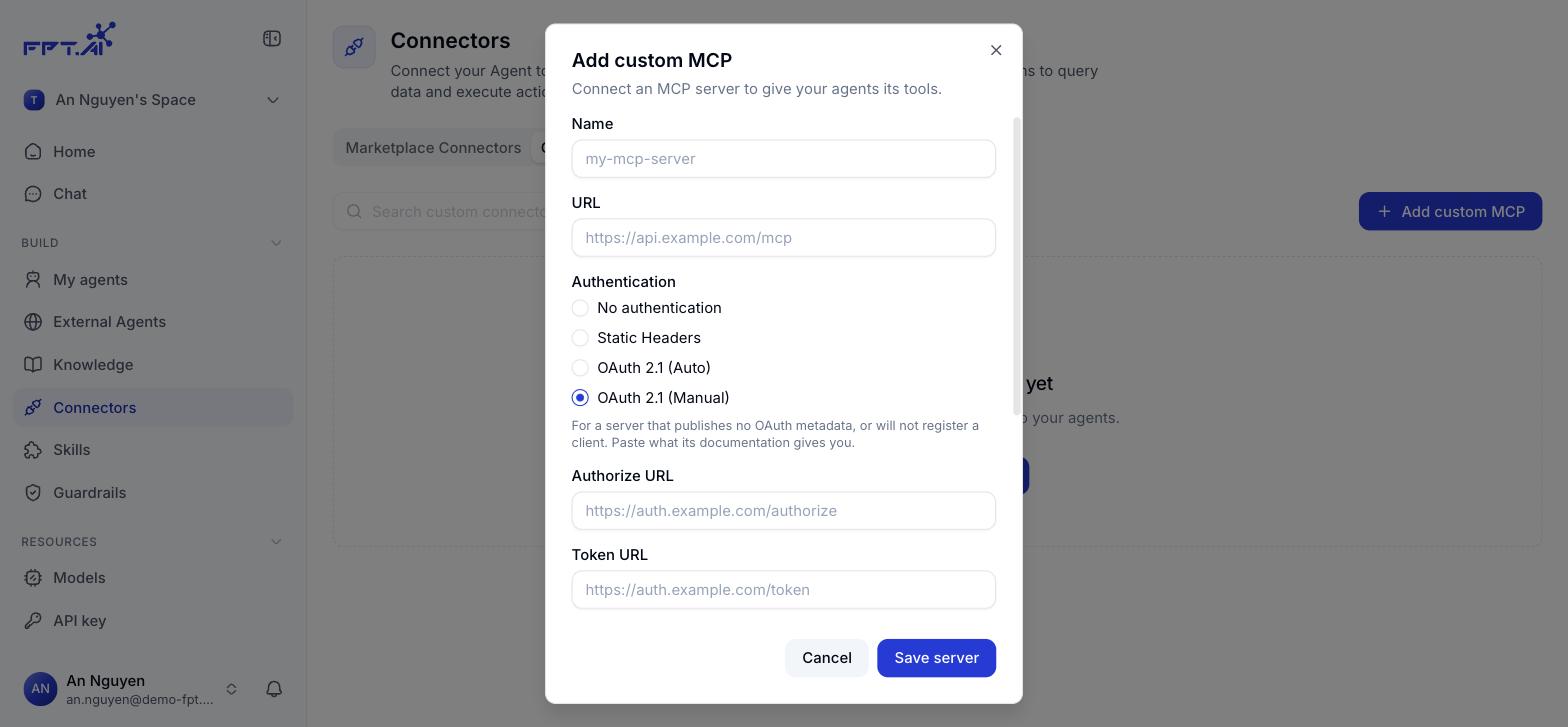
Four authentication types
OAuth 2.1 is an open standard, tied to no single provider. Any server that speaks OAuth 2.1 can be connected.
Fields for OAuth 2.1 (Manual)
1
Open the dialog
Go to Connectors, select the Custom Connectors tab, then click Add custom MCP.
2
Fill in name and URL
Give it a name you will recognise in the list, then paste the server MCP endpoint.
3
Pick the authentication type
Try OAuth 2.1 (Auto) first. Switch to OAuth 2.1 (Manual) only when the server cannot describe itself.
4
Save the server
Click Save server. It appears in the Custom Connectors list, ready to attach to an agent like any other Connector.