
This page shows how to use a REST API connector that already exists in the Workspace inside an Agent. If you don’t have one yet, create it first in Custom API connectors in the Space.
Entry point
My agents → open an Agent → Build → Configuration panel → Connectors section → +.Attach the Connector to an Agent
1
Open the Agent's Connectors section
Open the Agent. On the Build screen, select the Configuration panel and click + in the Connectors section.
2
Choose the account type
Choose Shared (one Workspace account) or Per-user (each person’s own account).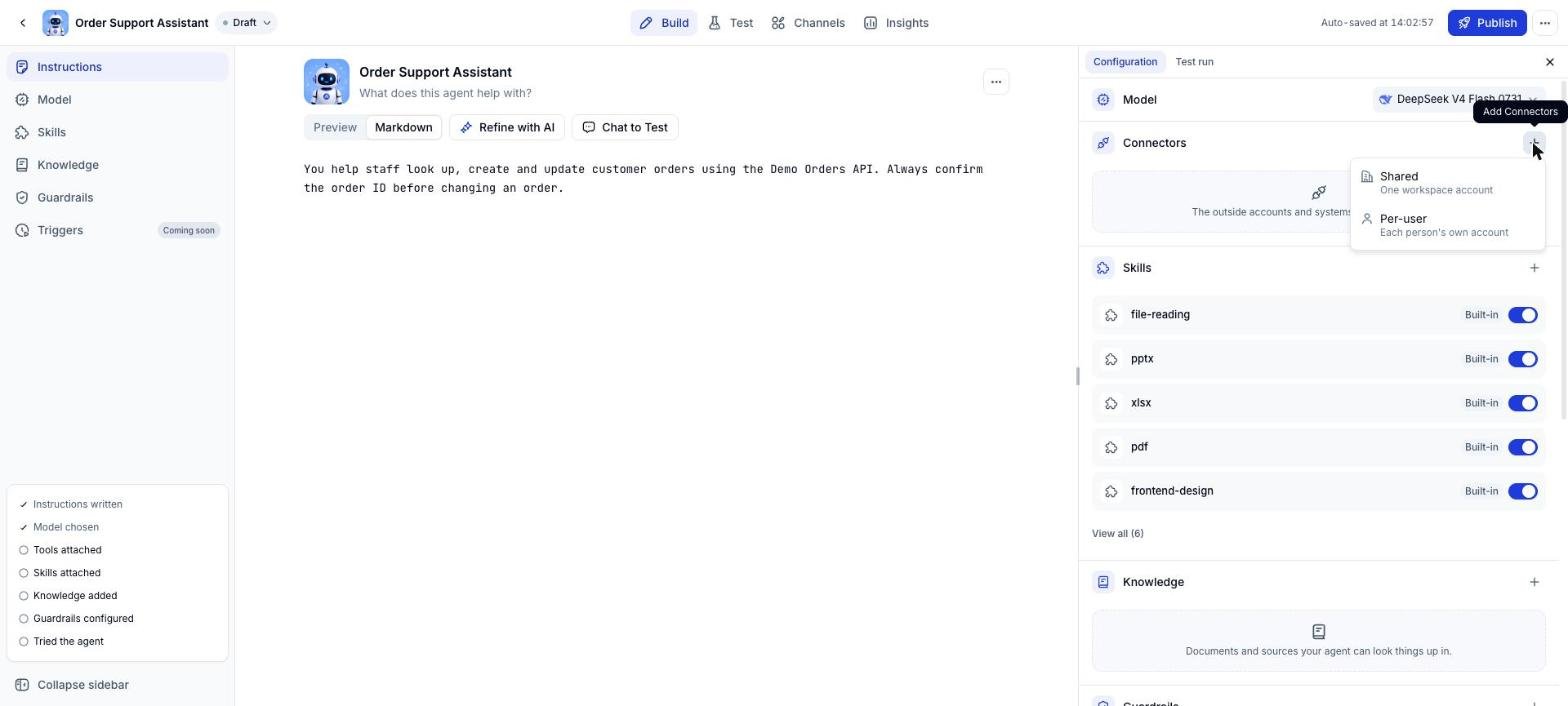
3
Select the Connector and click Done
Custom Connectors are listed together with the built-in ones. Select the Connector and click Done. Create connector at the bottom opens the same REST API dialog as the Connectors page.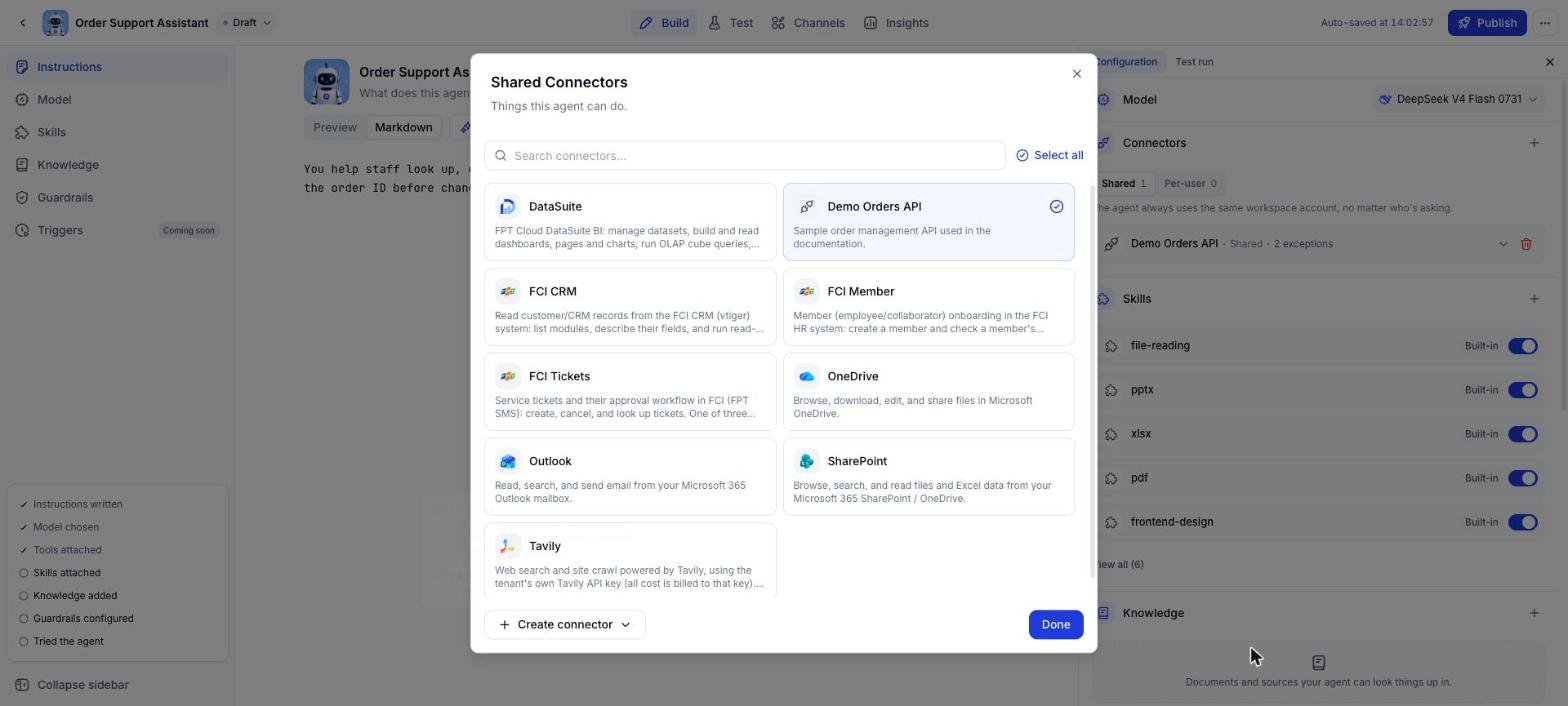
4
Expand the Connector to see its operations
The Connector appears in the Connectors section with its account type and the number of exceptions. Click the row to see the account in use and the permission of each operation.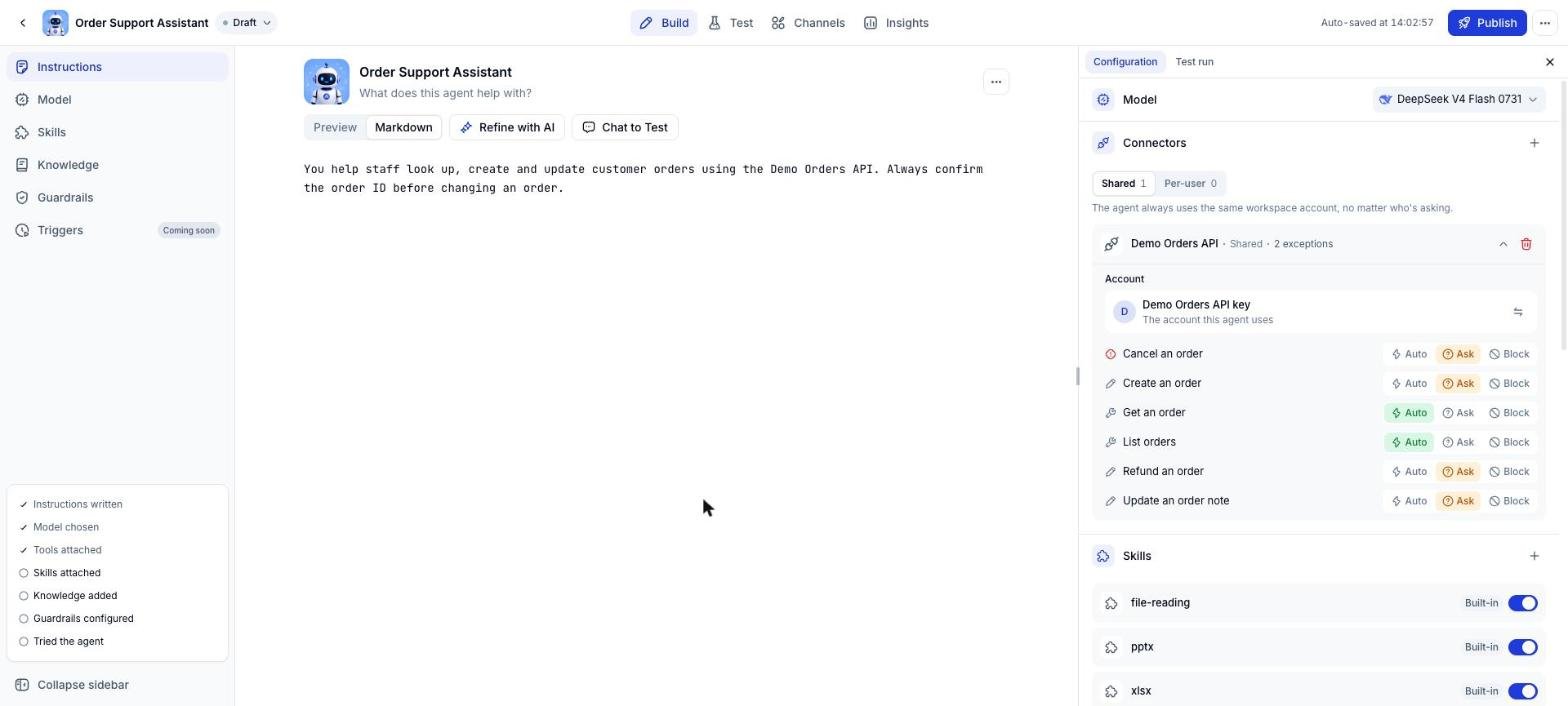
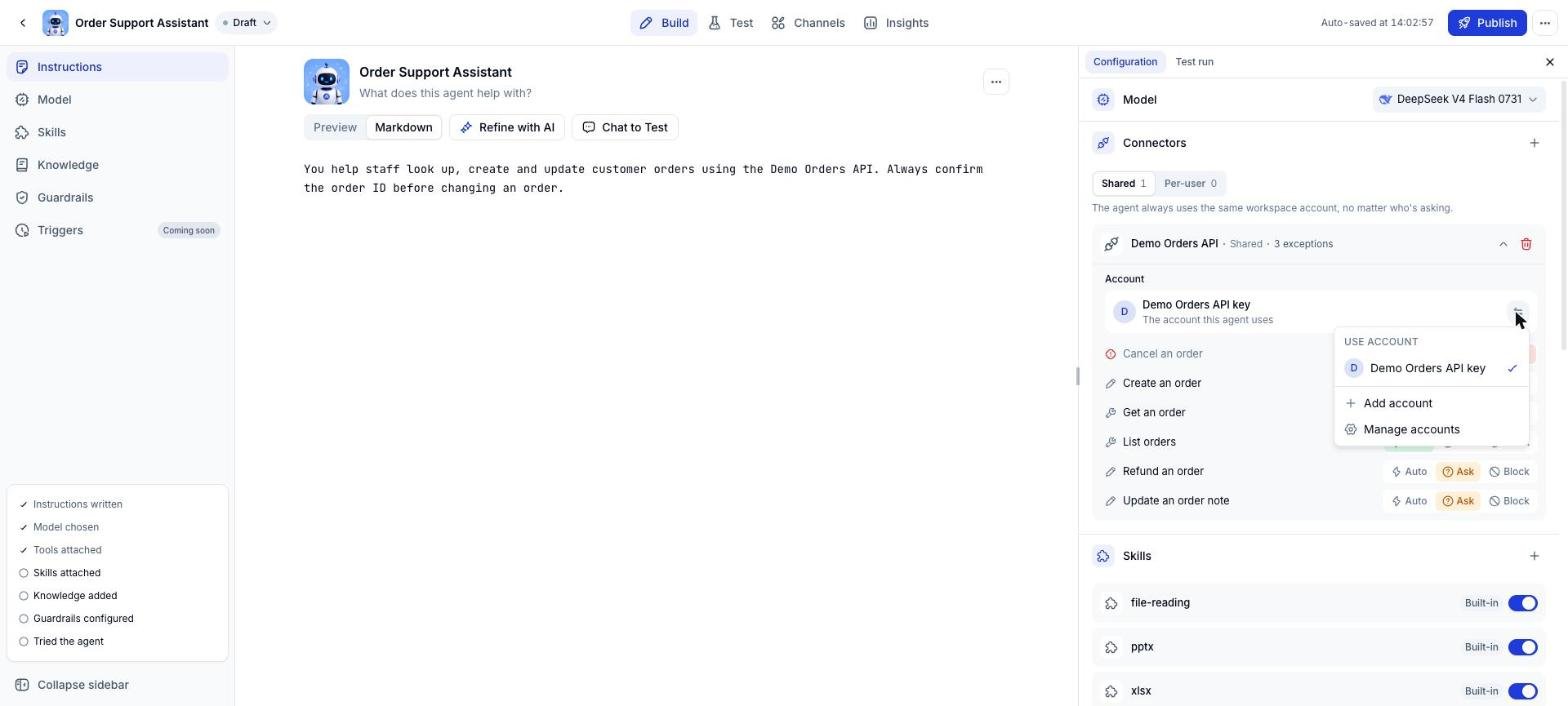
With Shared, the Account area shows which account the Agent uses. Click the switch icon to pick another account, Add account or Manage accounts.
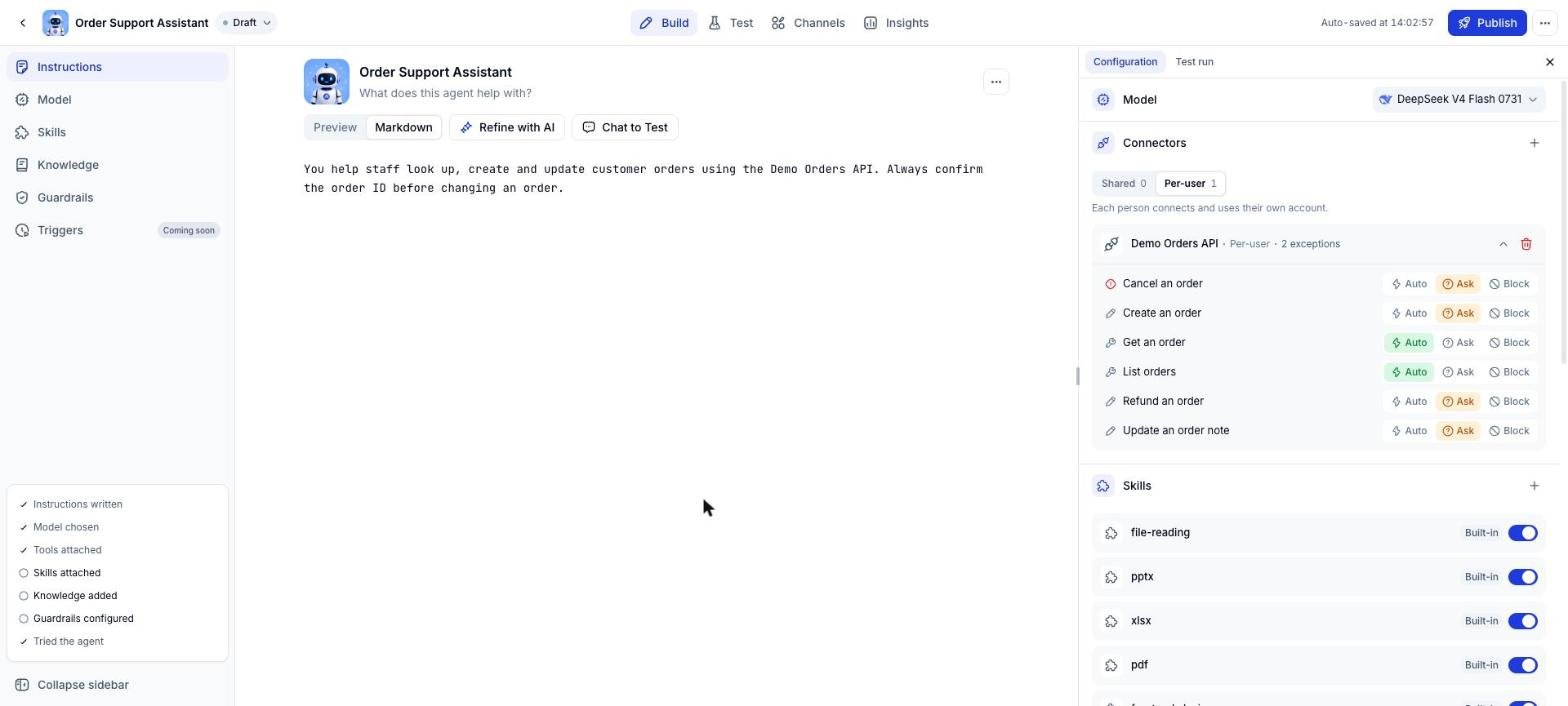
On one Agent, a Connector can be attached with only one account type. A Connector already attached as Shared shows Already added · Shared in the Per-user picker. To switch types, remove the Connector and attach it again.
Set a permission for each operation
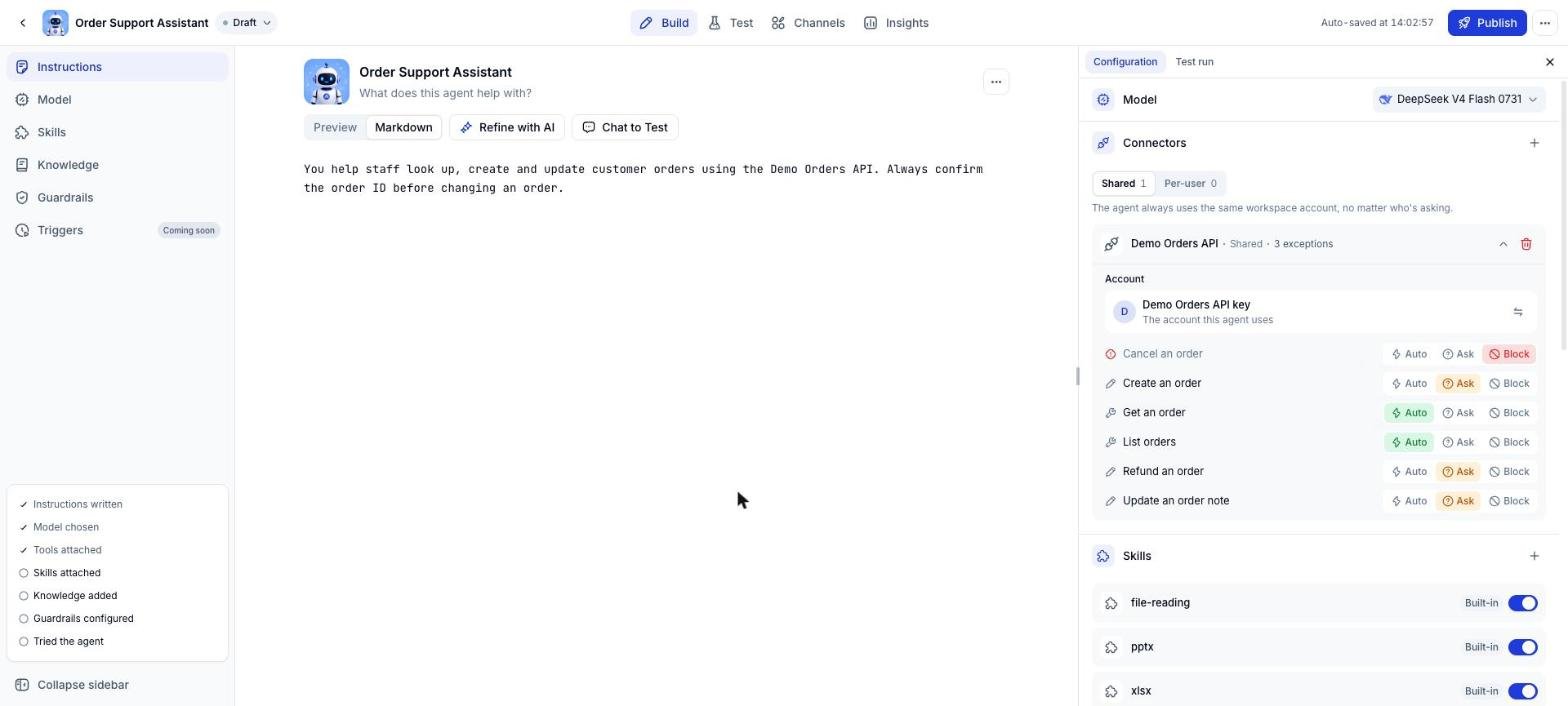
Each operation has three permission levels:
The exceptions count next to the Connector name tells you how many operations differ from their default. The example below sets Cancel an order to Block so the Agent can’t cancel orders.
Test the Agent with the Connector
1
Send a request on the Test run tab
Open the Test run tab and send a request that needs the API, for example: Create an order for customer Tran Thi B with a total of 250000.
2
Approve or reject the action
For an operation set to Ask, the Action needs your approval card shows the operation and the arguments the Agent wants to send. Click Approve to call the API. Click Reject to skip the call, optionally with a Rejection reason so the Agent can adjust.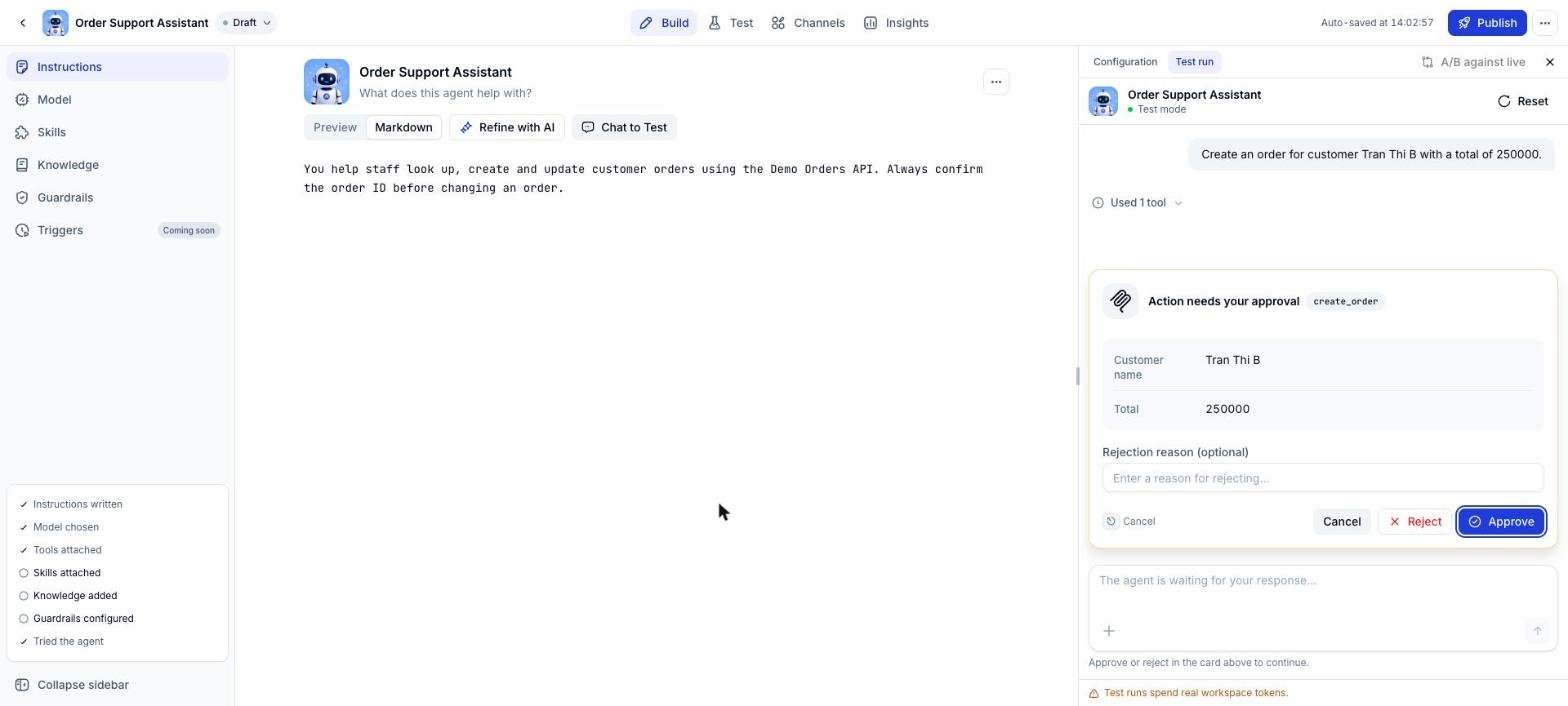
3
Check the arguments and the result
After the Agent replies, expand Used N tools and then the tool name to see the Arguments that were sent and the Result the API returned.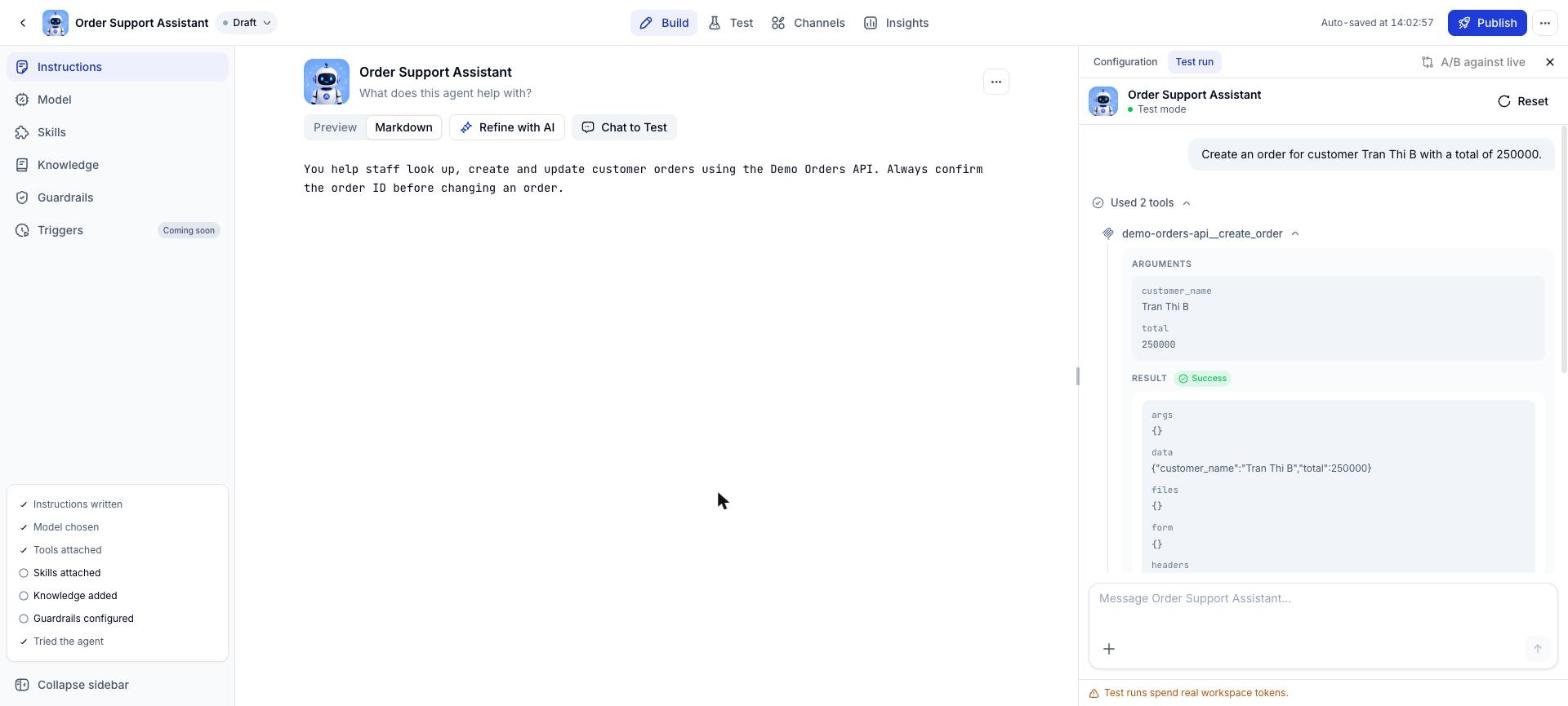
Connector changes in an Agent are auto-saved to the draft. End users only see them after you Publish a new version of the Agent.
Remove the Connector from an Agent
Click the trash icon on the Connector row in the Connectors section. The Connector is removed right away, with no confirmation dialog. It stays in the Workspace and you can attach it again at any time.When the Connector is re-imported in the Space, operations removed or renamed in the new document are no longer available in the Agent. Open the Agent’s Connectors section to check permissions and run a test again.
Troubleshooting
See also
Custom API connectors in the Space
Create, edit, re-import and delete Connectors.
Connectors
How to attach built-in Connectors and set tool permissions.